Spreadsheet Quick Guide
Table of contents
- Before you start
- Spreadsheet tab organization
- How to link entities
- How to indicate a library preparation was sequenced more than once
- How to link more than one entity in a cell
- Example spreadsheets
- Additional guidelines on how to curate specific technologies
- Additional resources about HCA metadata
Google Sheets and Excel spreadsheets are used to gather metadata about your project. This document is a brief walkthrough to help you get started filling out an HCA metadata spreadsheet.
If you have any questions at any stage while filling out the spreadsheet, please contact the data wrangling team at:
wrangler-team@data.humancellatlas.org.
Before you start
Metadata is represented in a spreadsheet with tabs that relate to the experimental design. For example, an Organoid tab would be included if an experiment includes organoid samples, whereas a Donor organism tab would be included if your experiment derived from a Donor. If you think your spreadsheet is missing fields or tabs to properly describe your experiment, please contact a data wrangler at wrangler-team@data.humancellatlas.org.
Spreadsheet tab organization
Metadata is collected for each component of your experiment, for example: project, donor, sequence file, and dissociation protocol. We refer to each component as an entity. Each of these entities has a separate tab in the spreadsheet.
Each row in each tab corresponds to one instance of the entity described by the tab name. For example, in the Donor organism tab, each row describes one donor. In the Sequence file tab, each row describes one sequence file. The same applies for the Analysis file tab. Only one row in the Project tab should be filled in to describe the whole project.
Tab layout
All tabs share some common properties:
- The first row is the metadata field name
- The second row is the field description
- The third row contains one or two example values and guidelines, when appropriate, separate examples are separated with ;
- The fourth row is used for programmatic spreadsheet processing and is hidden
- The fifth row is intentionally left blank
- You should enter your values from the sixth row down
Project metadata tabs
The following tabs should be in your spreadsheet as they apply to most projects:
Project(fill out one row)Project - ContributorsProject - FundersProject - Publications(only fill out if your data has been published or has a pre-print)
Biomaterial metadata tabs
We use the term ‘Biomaterial’ to refer to all parts of your experiment that derive from a biological source.
The following tabs may be in your sheet depending on your experimental design:
Donor organismSpecimen from organismCell suspensionCell lineOrganoidImaged specimen
File metadata tabs
Every data or supplementary file associated with your project requires an entry in one of the following tabs:
Sequence fileAnalysis fileImage fileSupplementary file
Protocol metadata tabs
Each protocol used in your experiment needs to be described once in the relevant protocol tab (listed below). Once it has been described once it can be referred to using its ID to link between the different Biomaterial and file entities.
Aggregate generation protocol- Used in organoid experiments to describe how cultured cells are developed into cell aggregatesCollection protocol- Commonly used betweenDonor organismandSpecimen from organismto describe the process of collecting an organ or tissue sample from a donor.Differentiation protocol- Used in cell line and organoid experiments to describe how a cell is differentiated into a particular cell type or organoidDissociation protocol- Used to describe how aSpecimen from organismwas separated into individual cells or nuclei. This is not required if the collected specimen is a fluidEnrichment protocol- Used to describe how a biomaterial was enriched for a particular feature or characteristic of interest, such as a particular cell type. For example it can be used to describe FACS, MACS, size filteringiPSC induction protocol- Used to describe how a biomaterial was treated to become an induced pluripotent stem cell lineImaging preparation protocol(imaging transcriptomics only)Imaging protocol(imaging transcriptomics only)Probe(imaging only)Channel(imaging only)
Library preparation protocol- used in sequencing experiments to describe how the sequencing library was preparedSequencing protocol- used in sequencing experiments to describe how the library was sequencedAnalysis protocol- used in sequencing experiments to describe how the count matrices/expression analysis were generated
How to link entities
Linking biomaterials and files
The first ID columns in the Biomaterial and Protocols tabs are unique identifiers for each row in that tab. For example DONOR ORGANISM ID in the Donor organism tab and COLLECTION PROTOCOL ID in the Collection protocol tab. Similarly, the FILE NAME columns in the File tabs are unique identifiers for each row in that tab. Values in these columns must be unique within the spreadsheet. These unique identifiers are used in multiple tabs to link entities together. Please note that files can only be linked to biomaterials, so Analysis files need to be linked with the biomaterial closest to the generation of the file (Usually a Cell suspension).
For example, consider an experiment with entities that are linked as follows:
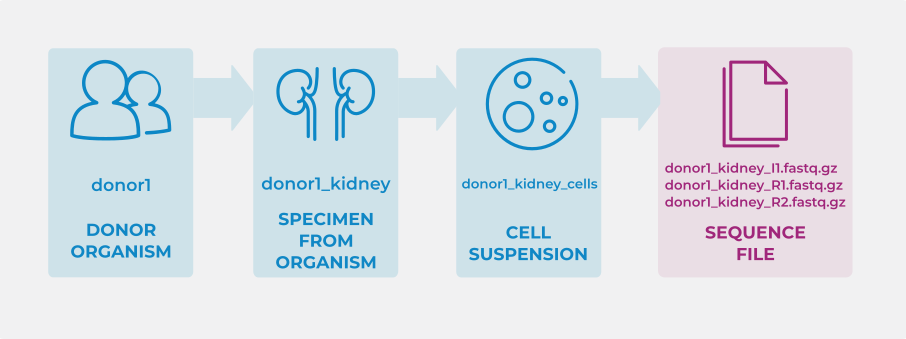
In each of these tabs, one entity (row) is assigned an ID. For example: ‘donor1’, ‘donor1kidney’, ‘donor1_kidney_cells’, and ‘donor1_kidney(I|R)(1|2).fastq.gz’, respectively.
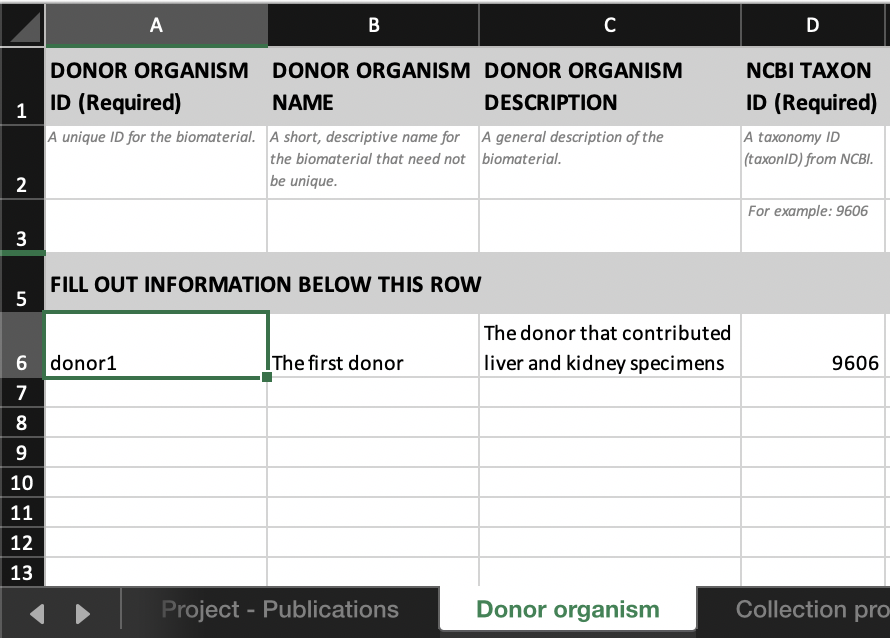
- The first few fields of the
DONOR ORGANISMtab would look like this:
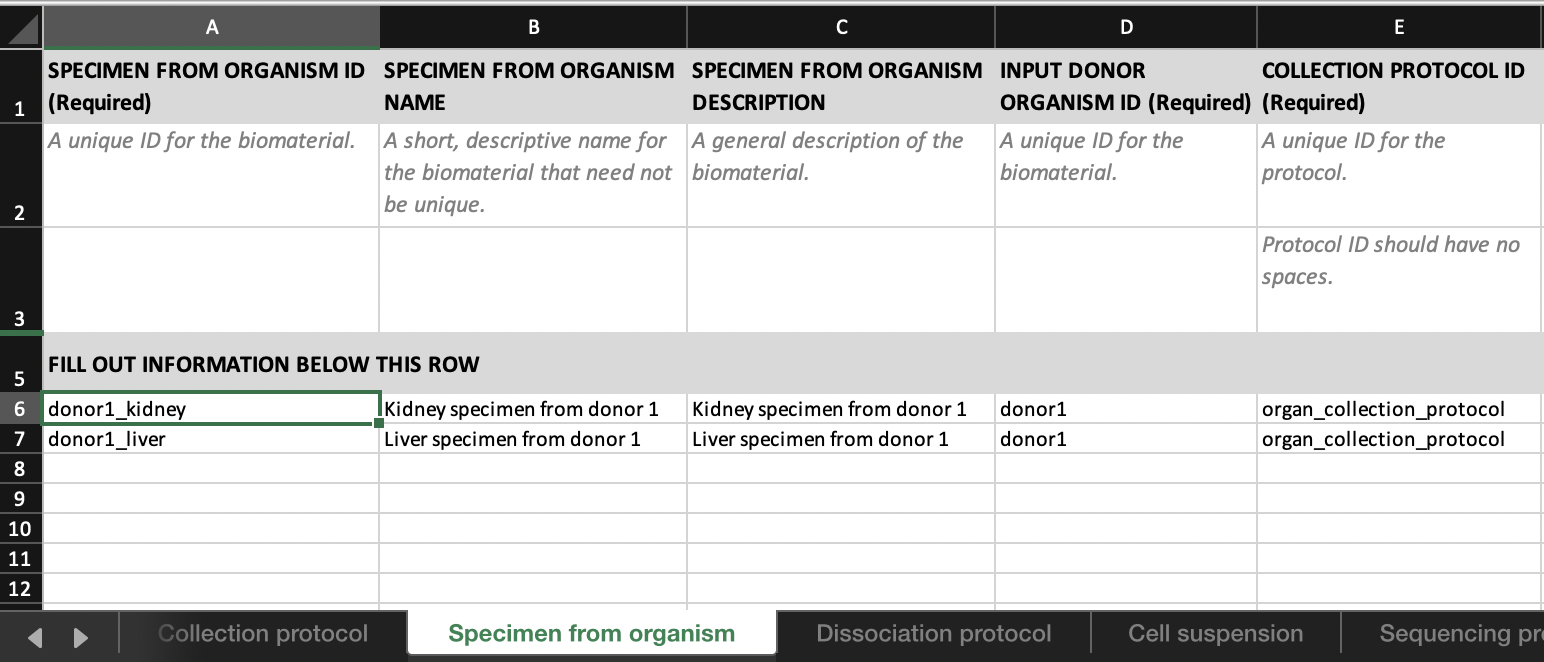
- Link ‘donor1_kidney’ to ‘donor1’ by entering ‘donor1’ in the
INPUT DONOR ORGANISM IDcolumn in theSpecimen from organismtab.
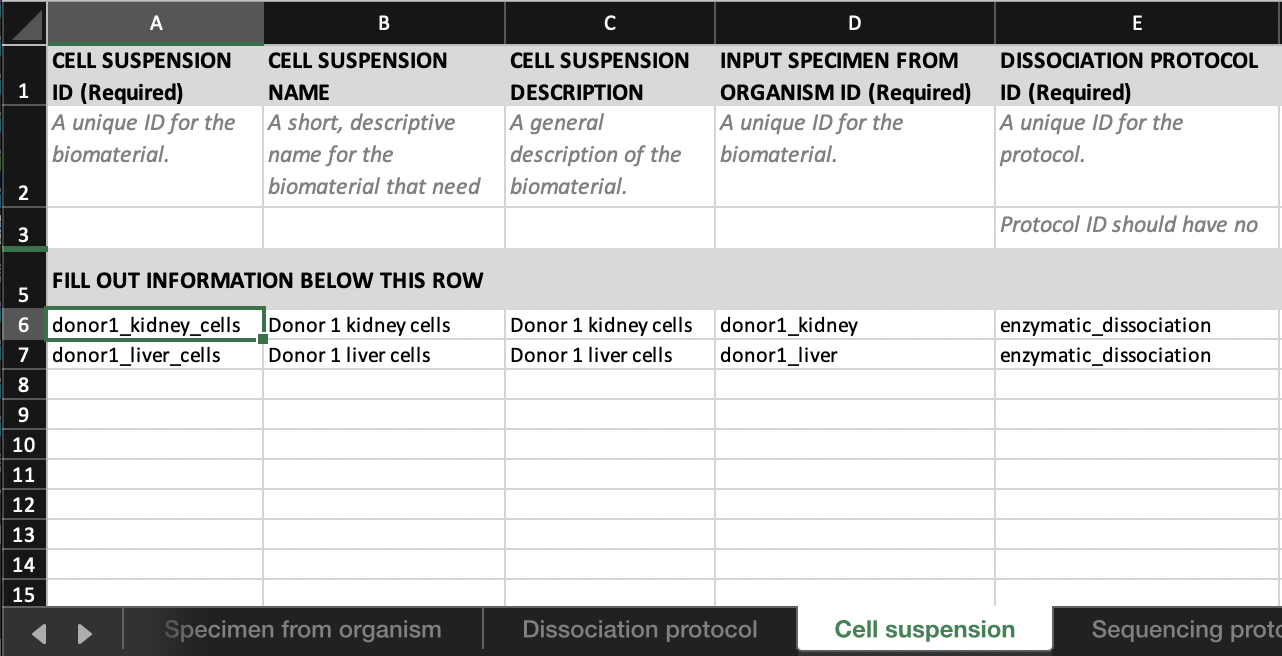
- Link ‘donor1_kidney_cells’ to ‘donor1_kidney’ by entering ‘donor1_kidney’ in the
INPUT SPECIMEN FROM ORGANISM IDcolumn in theCell suspensiontab.
- Link the set of sequencing files;
- ‘donor1_kidney_I1.fastq.gz’
- ‘donor1_kidney_R1.fastq.gz’
- ‘donor1_kidney_R2.fastq.gz’
to ‘donor_1_kidney_cells’ by entering ‘donor1_kidney_cells’ in the
INPUT CELL SUSPENSION IDcolumn in theSequence filetab.
Linking biomaterials and protocols
Protocols are used to describe the process of deriving a biomaterial or file from an input biomaterial.
Biomaterials are linked to the protocols used to generate them by entering the protocols’ IDs (from the corresponding Protocol tab) in the respective ID columns in the biomaterial tabs.
For example, consider a sequencing experiment that followed a dissociation protocol to produce a cell suspension from a kidney tissue sample.
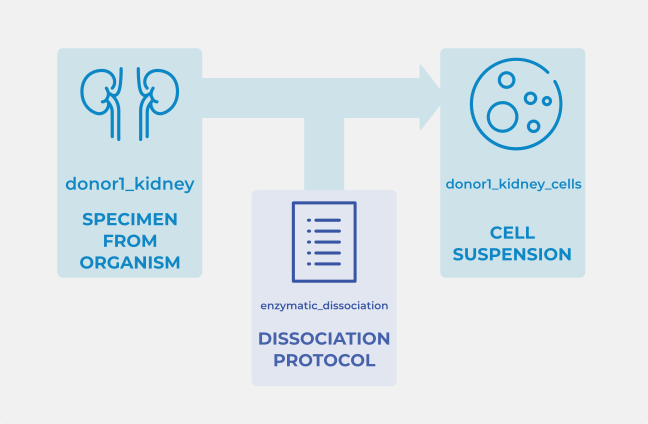
In each of these tabs, one entity is assigned an ID. For example: ‘donor1_kidney’, ‘enzymatic_dissociation’, and ‘donor1_kidney_cells’, respectively.
- In this case the first few fields of the
Dissociation protocoltab would look like this:
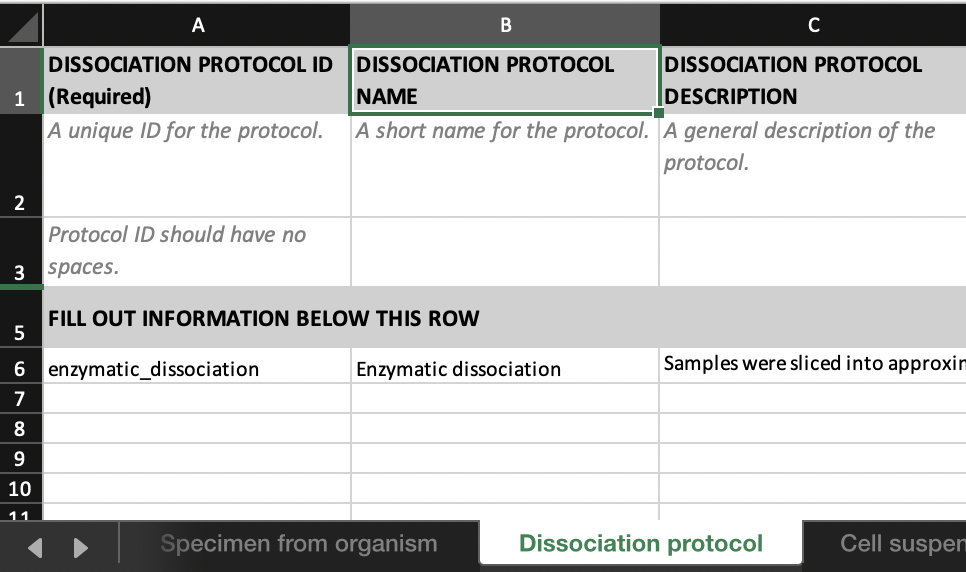
- We can link ‘donor1_kidney_cells’ to ‘enzymatic_dissociation’ (the protocol that derived the cell suspension) by entering ‘enzymatic_dissociation’ in the
DISSOCIATION PROTOCOL IDcolumn in theCell suspensiontab.
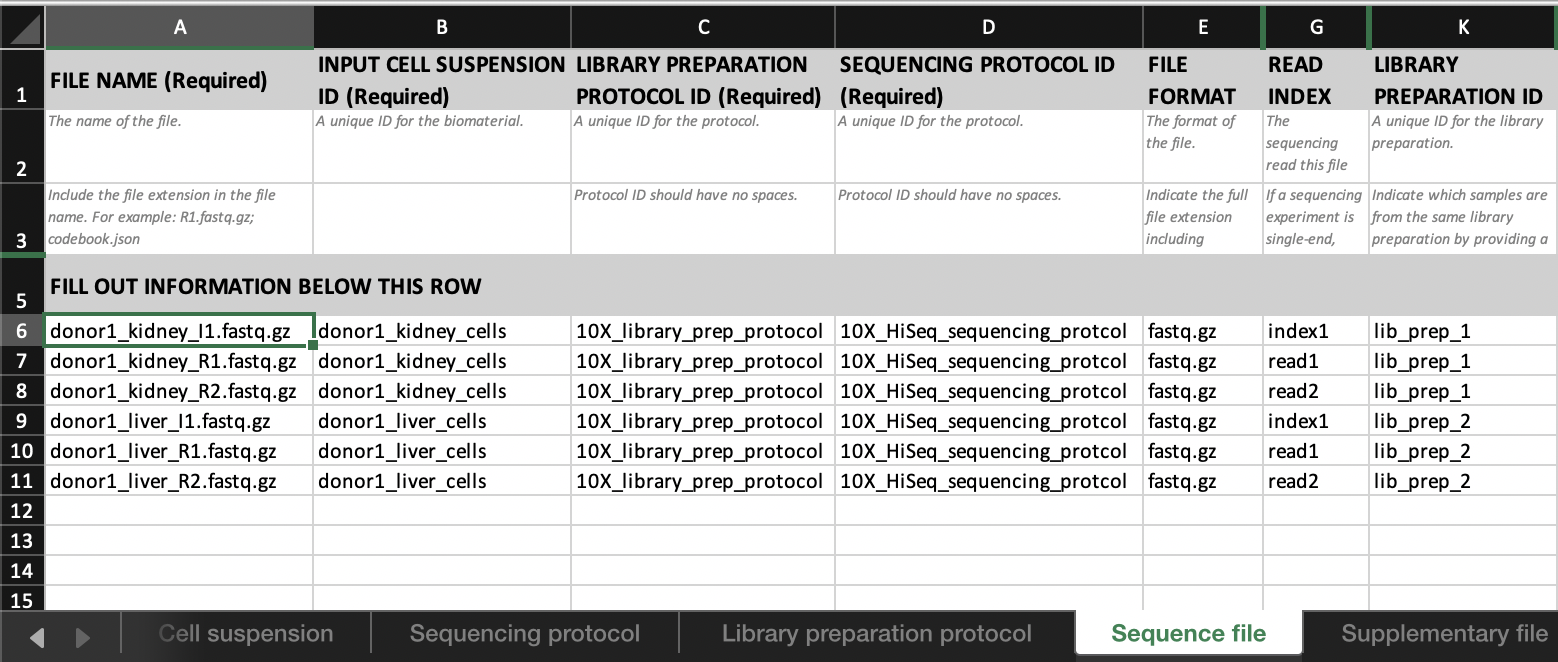
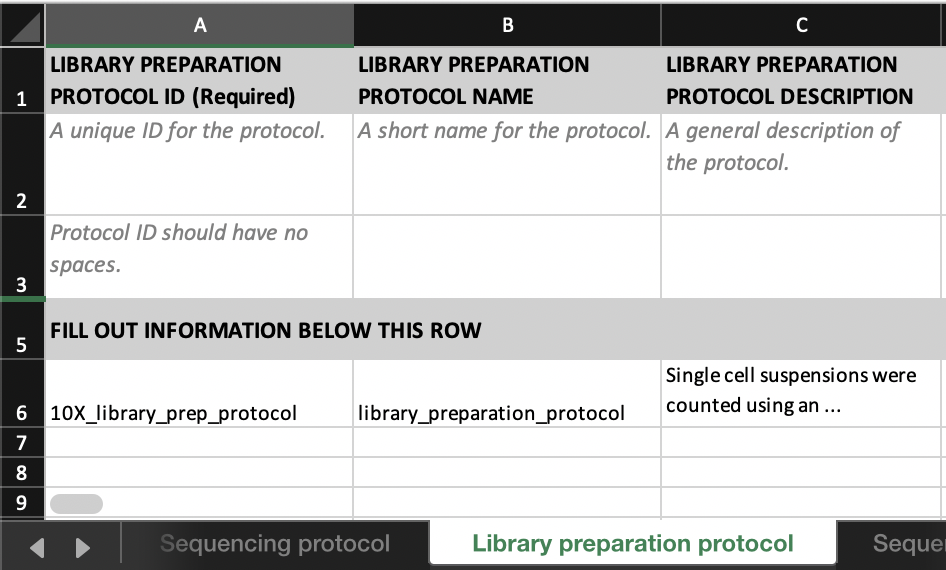
You can then follow the same process for linking other protocols, such as the LIBRARY PREPARATION PROTOCOL ID and SEQUENCING PROTOCOL IDs within the Sequence file tab to describe the process between Cell suspension and Sequence file.
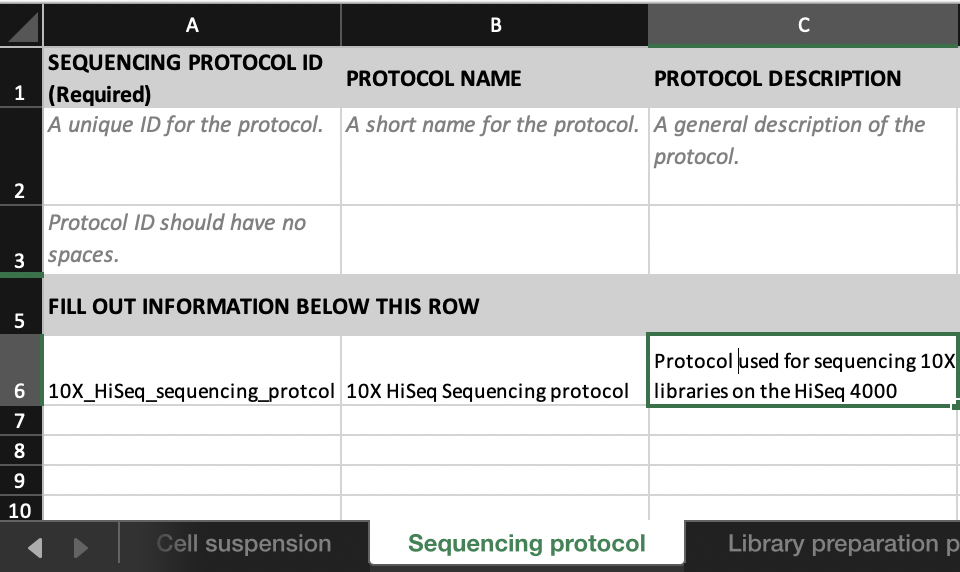
In the Library preparation protocol tab, fill in details about the library preparation protocol. You may find the parameters to fill for some well known technologies here.
In the Sequencing protocol tab, fill in details about how the library was sequenced. You may find the parameters to fill for some well known technologies here.
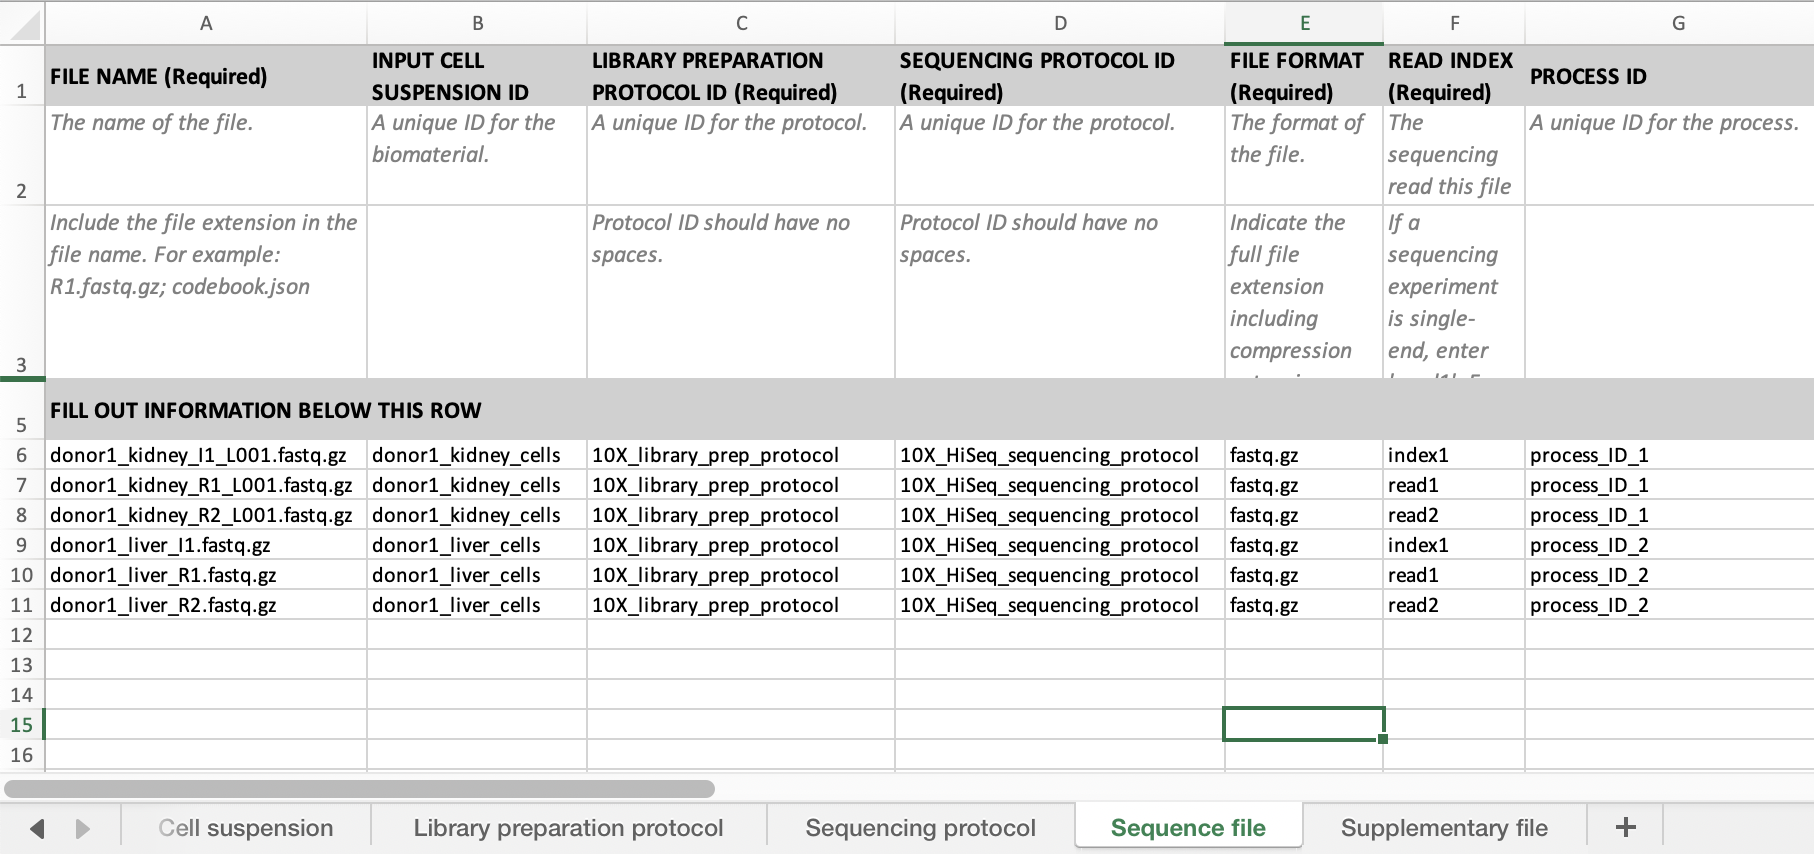
In the Sequence file tab, link the FILE NAME to the INPUT CELL SUSPENSION with the relevant LIBRARY PREPARATION PROTOCOL ID and SEQUENCING PROTOCOL ID.
If you have more than one read or index files per run you need indicate which files come from the same run by filling in the process id. Files with the same process id will be grouped together. See below for an example with read1, read2 and index1.
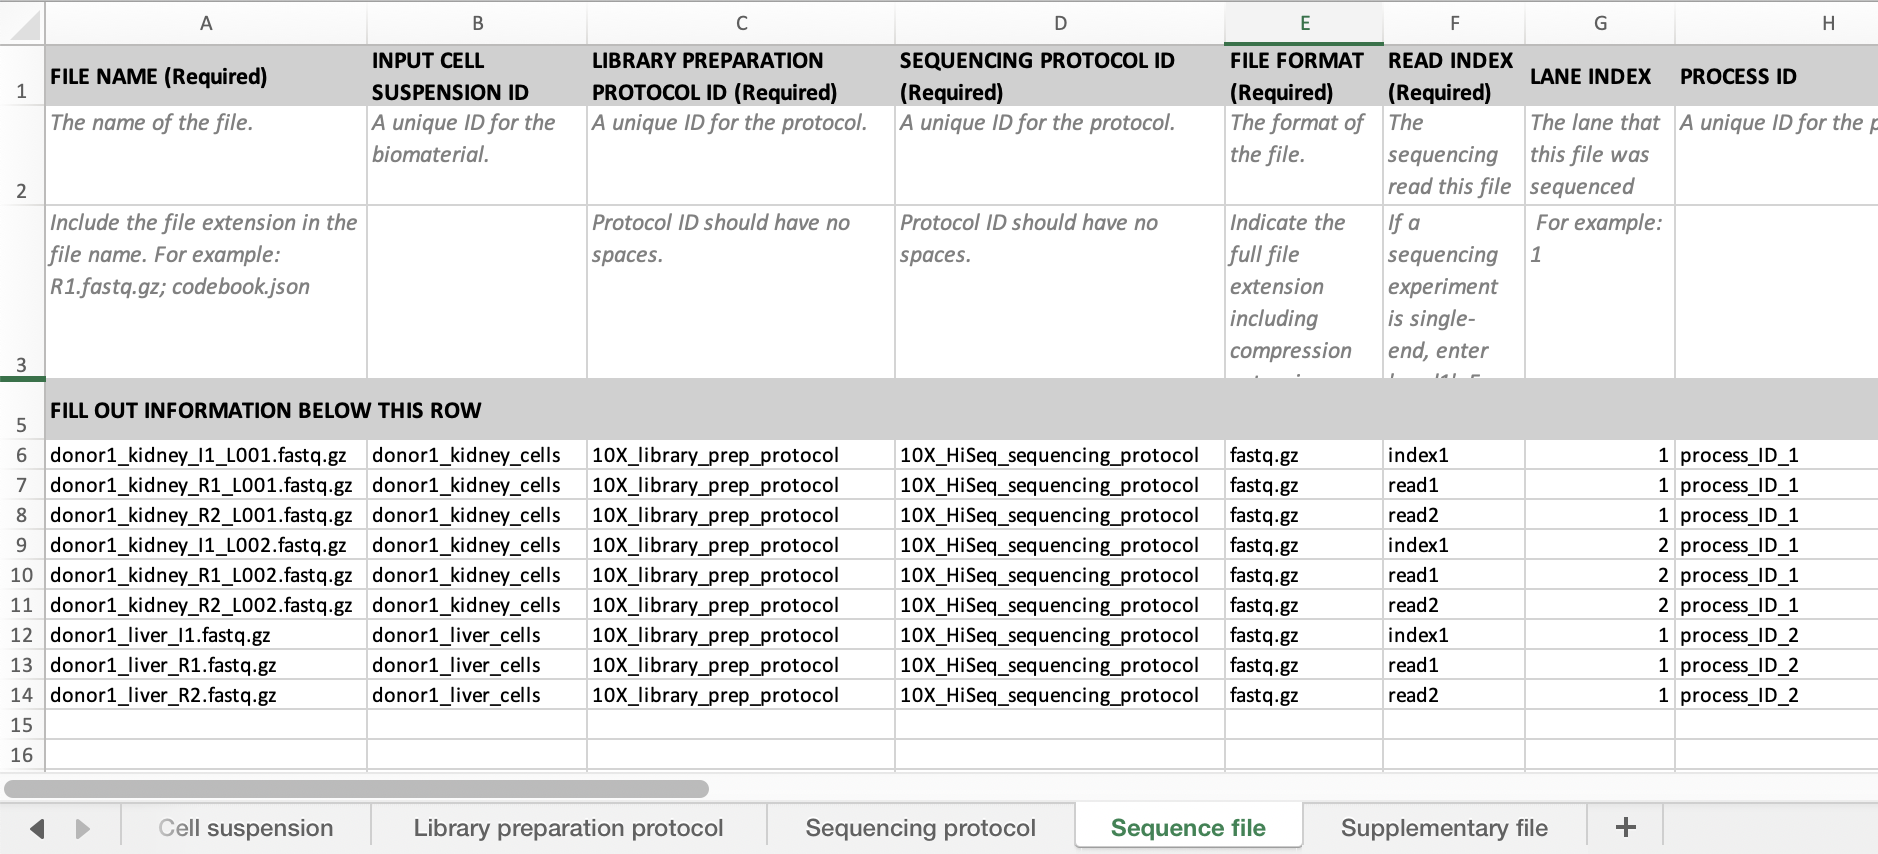
If you have reads from multiple lanes you need to fill in the process id as above and the lane index. See below for an example sheet.
How to indicate a library preparation was sequenced more than once
If the same library preparation has been sequenced more than once, this can be indicated in the spreadsheet by providing a unique identifier for each library preparation in the LIBRARY PREPARATION ID field in the Sequencing file tab.
For example:
| File Name | LIBRARY PREPARATION ID |
|---|---|
| file100_R1.fastq.gz | lib_prep_1 |
| file101_R1.fastq.gz | lib_prep_1 |
| file102_R1.fastq.gz | lib_prep_2 |
| file103_R1.fastq.gz | lib_prep_2 |
indicates that files file100_R1.fastq.gz and file101_R1.fastq.gz were both generated from the same library preparation, and files file102_R1.fastq.gz and file103_R1.fastq.gz were both generated from a different library preparation.
How to link more than one entity in a cell
If one entity (e.g. analysis file) derives from multiple entities of the same type (e.g. multiple cell suspension), this can be indicated in the spreadsheet by adding the || separator.
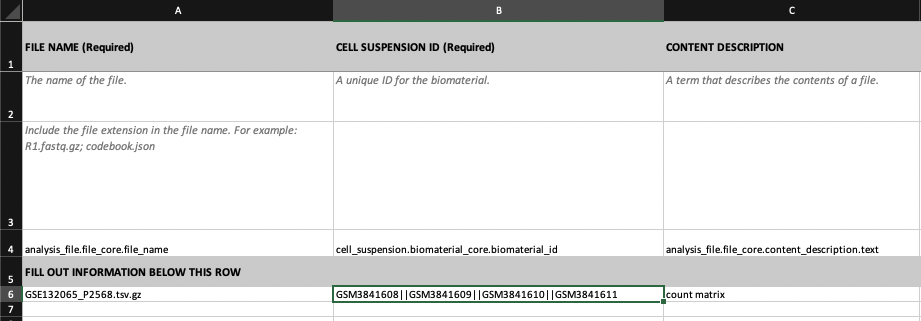
In this example, we have linked several cell suspensions by their ID (GSM3841608,GSM3841609,GSM3841610 and GSM3841611) to the analysis file with ID GSE132065_P2568.tsv.gz
Example spreadsheets
To see fully worked examples of filled in spreadsheets for a 10X and SmartSeq2 experiment, please use the buttons below:
Download 10X example spreadsheet
Download SS2 example spreadsheet
Additional guidelines on how to curate specific technologies
For technologies like Visium, scATAC-seq and CITE-seq, we have specified overview and curation guidelines.
Additional resources about HCA metadata
More information about HCA metadata can be found in the HCA Metadata Schema Github repo: HumanCellAtlas/metadata-schema
Google Sheets and Excel spreadsheets are used to gather metadata about your project. This document is a brief walkthrough to help you get started filling out an HCA metadata spreadsheet.
If you have any questions at any stage while filling out the spreadsheet, please contact the data wrangling team at: wrangler-team@data.humancellatlas.org.